Article: How to Use Chalk Paint® Decorative Paint: A Beginner’s Guide & FAQs

How to Use Chalk Paint® Decorative Paint: A Beginner’s Guide & FAQs
If you’ve never painted furniture before, Chalk Paint® decorative paint by Annie Sloan is one of the easiest ways to get started.
One of the first things I tell customers is: don’t be afraid of it — it’s just paint!
Choosing a colour or putting that first brushstroke on a piece of furniture can feel intimidating, especially if it’s a piece you’ve owned for years. But that’s one of the wonderful things about paint. If you decide you don’t love the colour, you can paint it again.
Chalk Paint® makes transforming furniture surprisingly simple. In most cases, you don’t need to spend hours sanding, stripping or priming before you begin. A good cleaning, your favourite Chalk Paint® colour and the right topcoat are often all you need.
Whether you’re painting your first thrift-store dresser, updating furniture you’ve had for years or giving your kitchen cabinets a completely new look, here’s how to use Chalk Paint® from start to finish.
Do You Need to Sand Before Using Chalk Paint®?
This is probably the question we hear most often:
“Do I really not have to sand it?”
Usually, no.
Chalk Paint® has excellent adhesion and is designed to stick to most furniture surfaces without sanding first. Most wood furniture can simply be cleaned and painted.
There are a few exceptions.
If the surface is extremely glossy or you’re painting something such as shiny laminate or melamine, a light sanding can help give the paint a better surface to grip. You may also want to sand if the existing surface is damaged, peeling or uneven.
You don’t need to sand off the entire existing finish. The goal is simply to rough up the surface just a little to give the paint something to grab on to.
Step 1: Clean Your Furniture
Even though you generally don’t need to sand or prime, you do need to start with a clean surface.
Furniture collects dust, fingerprints, furniture polish, grease and other residue over time. Kitchen furniture and cabinets can be particularly greasy.
For most pieces, a thorough cleaning with mild soap and water works well. Make sure you remove any soap residue and allow the piece to dry completely before you begin painting.
This is one step you don’t want to skip. Paint adheres best to a clean surface.
Step 2: Watch for Tannins and Bleed-Through
Primer isn’t normally necessary with Chalk Paint®, but occasionally the furniture itself can create a problem.
Some woods, particularly mahogany, oak and walnut, can contain tannins that occasionally bleed through lighter paint colours. New or knotty pine can also cause staining as resin from the knots comes through. Older furniture — particularly pieces with previous oil-based or dark stains — can sometimes cause bleed-through as well. You may not even know there’s a problem until you apply the first coat and see a yellowish, brown or pinkish stain appearing through the paint.
If this happens, don’t keep adding coats of Chalk Paint® hoping to cover it.
Seal the problem area with clear shellac or an appropriate stain-blocking product. Once it has dried, you can continue painting.
This is one of those situations where a little extra preparation can save you a lot of paint — and frustration.
Step 3: Apply Your First Coat of Chalk Paint®
Now comes the fun part.
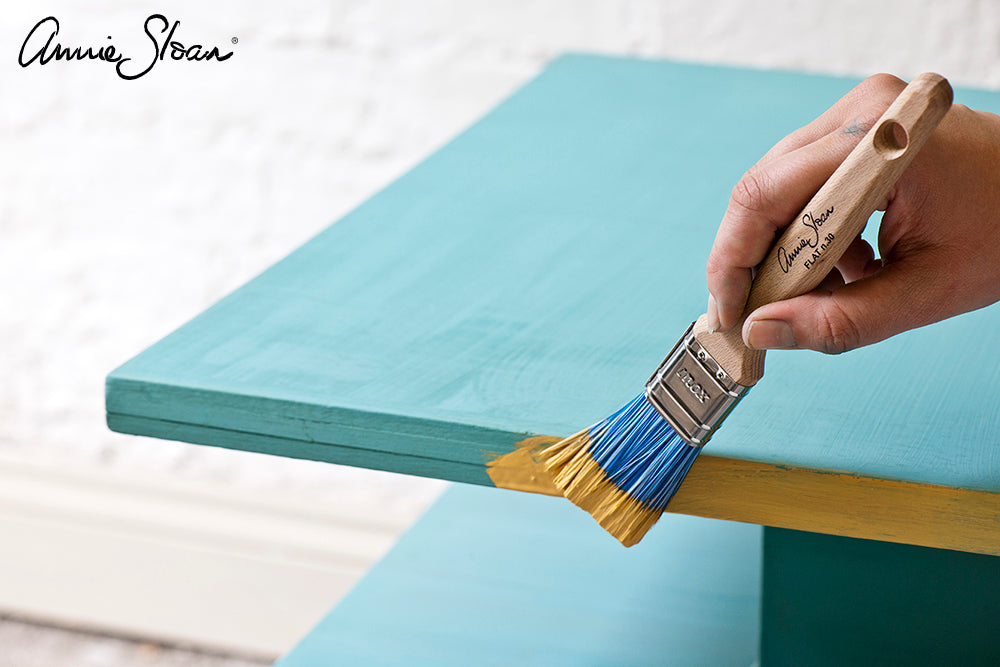
Stir your Chalk Paint® thoroughly and start painting.
For most furniture projects, expect to apply one to two coats, depending on the colour you’re using, the original surface and the look you’re trying to achieve.
Chalk Paint® dries remarkably quickly. On something like a dresser, I often find that by the time I’ve finished painting the whole piece, the area where I started is already dry or almost dry.
Around 30 minutes is common, although temperature, humidity, the surface and how heavily you apply the paint can all affect drying time.
Let the first coat dry before applying your next coat.
And remember — don’t overthink it. You don’t have to make every brushstroke perfect.
What Kind of Brush Should You Use With Chalk Paint®?
You don’t have to use an Annie Sloan brush. Any good-quality paintbrush can work, although Annie Sloan brushes are excellent and are designed with furniture painting in mind.
Your choice of brush can also help determine your finished look.
A natural-bristle brush holds a lot of paint, so you’ll find yourself dipping into the paint less often. It’s a great choice when you want a more traditional, textured or characterful Chalk Paint® finish.
For a smoother, more contemporary finish, I prefer a good synthetic brush. The paint tends to slide off synthetic bristles more easily, and they generally leave less texture behind.
A foam roller can also be used and is particularly handy on larger flat areas.
There isn’t one “right” brush. Choose the tool based on the finish you want to create.

How Do You Get a Smooth Finish With Chalk Paint®?
Chalk Paint® does not have to look rustic or heavily textured.
You can create a beautiful smooth, modern finish with it too.
If your paint feels a little thick, add a small amount of water. Chalk Paint® is water-based, so adding a little water can help it flow more easily and reduce visible brush marks.
Use a synthetic brush, apply thinner coats and avoid continually brushing back and forth over paint that has started to dry.
Overworking the paint is one of the most common mistakes I see beginners make when they want a smooth finish.
Once the paint is completely dry, you can lightly sand between coats if needed. For an especially smooth final finish, use 600-grit or finer sandpaper very lightly before applying your topcoat.
Remove all the sanding dust before moving on to your finish.
The combination is simple: slightly thinner paint, a synthetic brush, thin coats, minimal over-brushing and very light sanding.

Step 4: Protect Your Chalk Paint® With Wax or Lacquer
Once you’re happy with your painted finish, it needs to be protected.
For most furniture projects, your two main choices are Clear Chalk Paint® Wax or Chalk Paint® Lacquer.
Both are excellent topcoats. Which one you choose depends largely on how the finished piece will be used.
Finishing With Clear Wax
Clear Wax gives you the classic Annie Sloan finish and is a great choice for most furniture.
Work the wax evenly over the painted surface, making sure the entire area is covered, and remove any excess.
Allow the wax to harden a little overnight. The next day, simply buff it with a clean, lint-free cloth. The more you buff, the more sheen you can create.
Wax is durable, but furniture that receives frequent cleaning and heavy use may eventually need another application.
One advantage of wax is that it’s very easy to maintain. If an area eventually starts looking worn, you can simply clean it and refresh the wax where needed.
Finishing With Chalk Paint® Lacquer
For furniture and surfaces that will get heavier use or frequent cleaning, Lacquer may be the better choice.
Think kitchen cabinets, dining tables, floors and other high-traffic surfaces.
Unlike wax, Lacquer creates a more permanent protective coating and is particularly useful where you want a hard-wearing, water-resistant finish.
It’s also a good choice for suitable outdoor projects because it provides additional protection from the elements and UV exposure.
For something like kitchen cabinets that will be wiped down and cleaned frequently, I would choose Lacquer over Wax.
Should You Use Clear Wax Before Dark, Black or White Wax?
This is another mistake I see quite often.
Someone wants an aged look with Dark Wax, additional depth with Black Wax or a softer effect with White Wax, so they buy only the coloured wax.
My advice is simple:
Start with Clear Wax first.
The Clear Wax creates a workable base that makes the coloured wax much easier to spread and control. You can gradually build the effect rather than having the coloured wax immediately grab onto the porous Chalk Paint®.
It also makes it much easier to correct an area if you apply more coloured wax than you intended.
When you’re experimenting with coloured waxes for the first time, remember that it’s much easier to add more than to wish you had used less!

Can You Use Chalk Paint® on More Than Wood?
Absolutely.
One of the reasons I love Chalk Paint® is its versatility. It isn’t just for wooden furniture.
Depending on the project and the preparation required, Chalk Paint® can be used on many surfaces, including:
Wood and previously painted furniture
Laminate and melamine
Metal
Brick, stone and concrete
Terracotta
Floors
Some fabrics
Kitchen cabinets
Outdoor furniture
Some unusual surfaces require special preparation, so if you’re not sure about the piece you want to paint, ask us before you start.
A quick question before you begin can save you time and help you choose the right preparation, paint and topcoat for the job.

How Many Coats of Chalk Paint® Do You Need?
For most projects, one or two coats will do the job.
The exact number depends on the colour you choose, the colour underneath it and the finish you want.
If you’re making a dramatic colour change — for example, painting a very dark piece with a much lighter colour — you may need an additional coat.
Don’t assume that thicker coats will get the job done faster. Two thinner coats will often give you a nicer finish than trying to cover everything with one very heavy coat.
How Long Does Chalk Paint® Take to Dry?
Chalk Paint® is known for drying quickly.
In normal conditions, you may find the paint feels dry to the touch in around 30 minutes. On a larger piece such as a dresser, the area where you started may already be dry by the time you reach the other end.
Keep in mind that drying time can change depending on humidity, temperature, airflow and how heavily the paint was applied.
Dry to the touch also isn’t the same thing as fully cured, particularly when you’re talking about your protective finish. Give your finished piece appropriate time before putting it into heavy use.
Do You Have to Seal Chalk Paint®?
Yes, in most cases.
Chalk Paint® needs a protective finish for normal furniture use.
For most projects, that means finishing with Clear Chalk Paint® Wax or Chalk Paint® Lacquer.
Your choice should be based on how the piece will be used rather than simply which finish you happen to have on hand.
For a dresser, nightstand or decorative furniture, I usually love the look and feel of Wax.
For something that will be frequently cleaned or subjected to heavier wear — especially kitchen cabinets — Lacquer is often the more practical choice.
What If You Make a Mistake?
This may be the most important part of this entire guide.
It’s just paint.
If you don’t like a brushstroke, you can fix it.
If you create too much texture, you can lightly sand it.
If you decide you chose the wrong colour, you can paint over it.
If you try a decorative effect and decide it isn’t for you, you can change it.
Furniture painting should be fun. Chalk Paint® gives you tremendous freedom to experiment without feeling as though every decision is permanent.
Ready to Paint Your First Piece?
Start with a good cleaning, choose a colour you love and put some paint on your brush.
You can create a rustic, textured finish or something sleek and contemporary. You can distress it, layer colours, experiment with coloured waxes or keep everything simple and modern.
There are very few rules — and plenty of room to make the finished piece your own.
At Décor on a Dime, we carry Chalk Paint® decorative paint by Annie Sloan, waxes, lacquers, brushes and painting supplies, with online ordering available across Canada.
And you’re not on your own once you buy the paint.
If you’re unsure how to prepare a particular piece, which finish you should use or how to achieve the look you have in mind, ask us. We’re happy to help.
Sometimes one small piece of advice is all it takes to turn that piece of furniture you’ve been putting off painting into your next favourite project.

Looking for more information about buying Chalk Paint® in Canada? Read our complete Canadian buying guide.
Ready to get started? Shop Chalk Paint® and find the colour that inspires you.